

Due to work and study needs, we often have to watch foreign language videos. Without a solid language foundation or if the video lacks subtitles, watching can be quite challenging. Even if you have some language skills, translating videos, creating subtitles, and setting timelines can be time-consuming. To address these challenges, SubEasy can help you get things done quickly.
1. Choose Your File
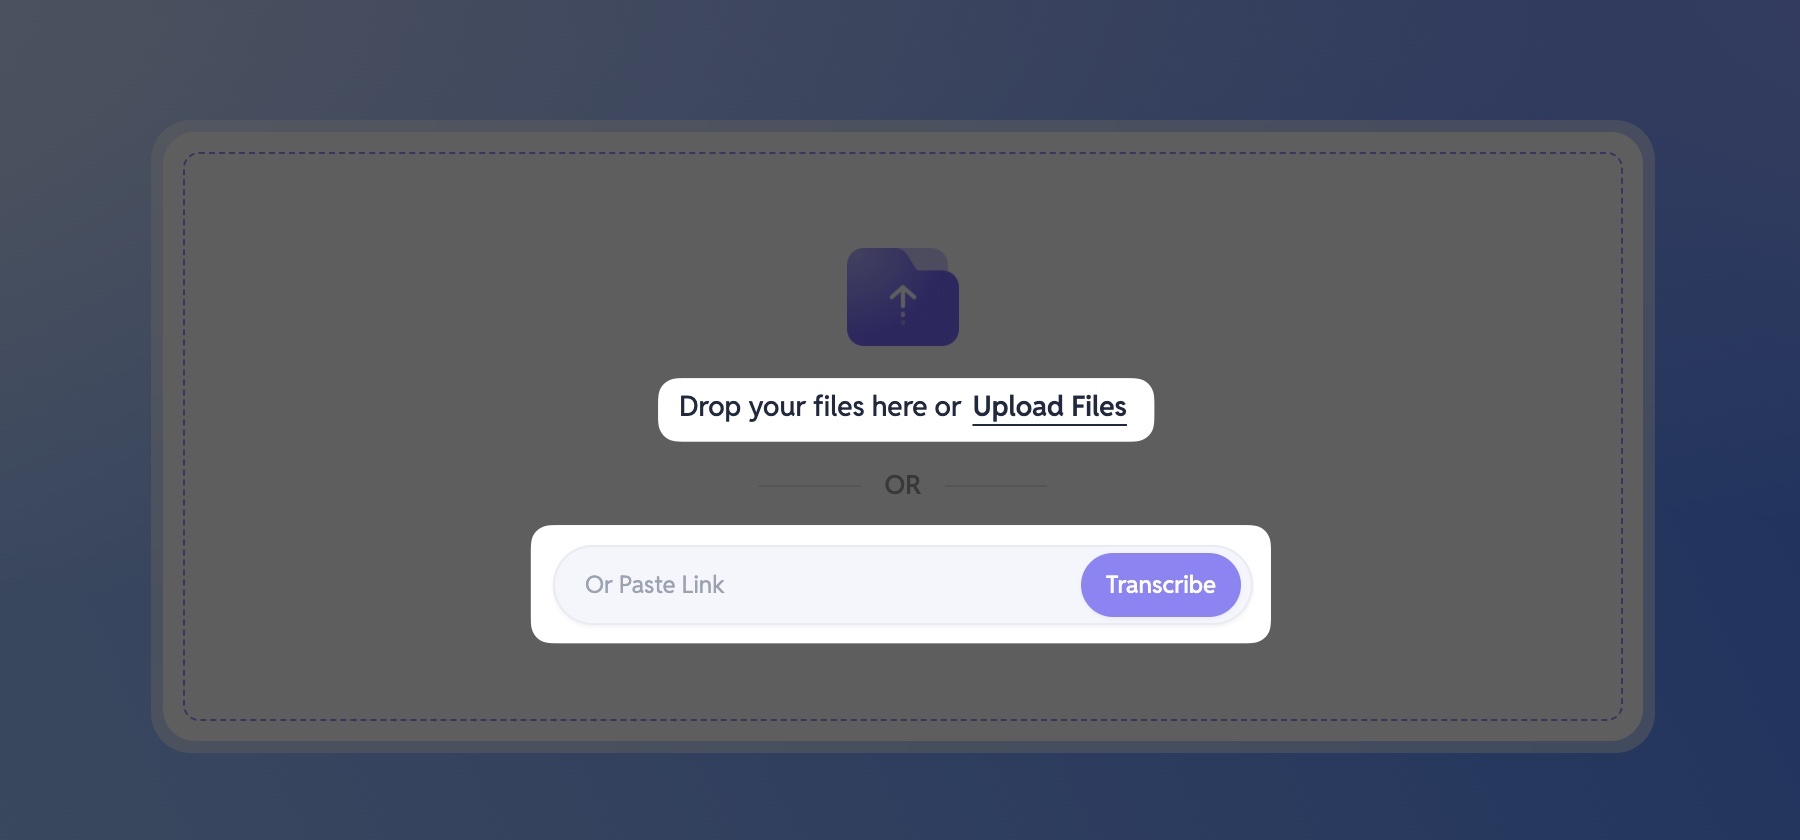 Go to the SubEasy website. You can drag and drop your video or audio file to upload it, or manually select a file. If your video is from platforms like YouTube or TikTok, you can also paste the video link, and SubEasy will automatically detect and load the video.
2. Transcription Options
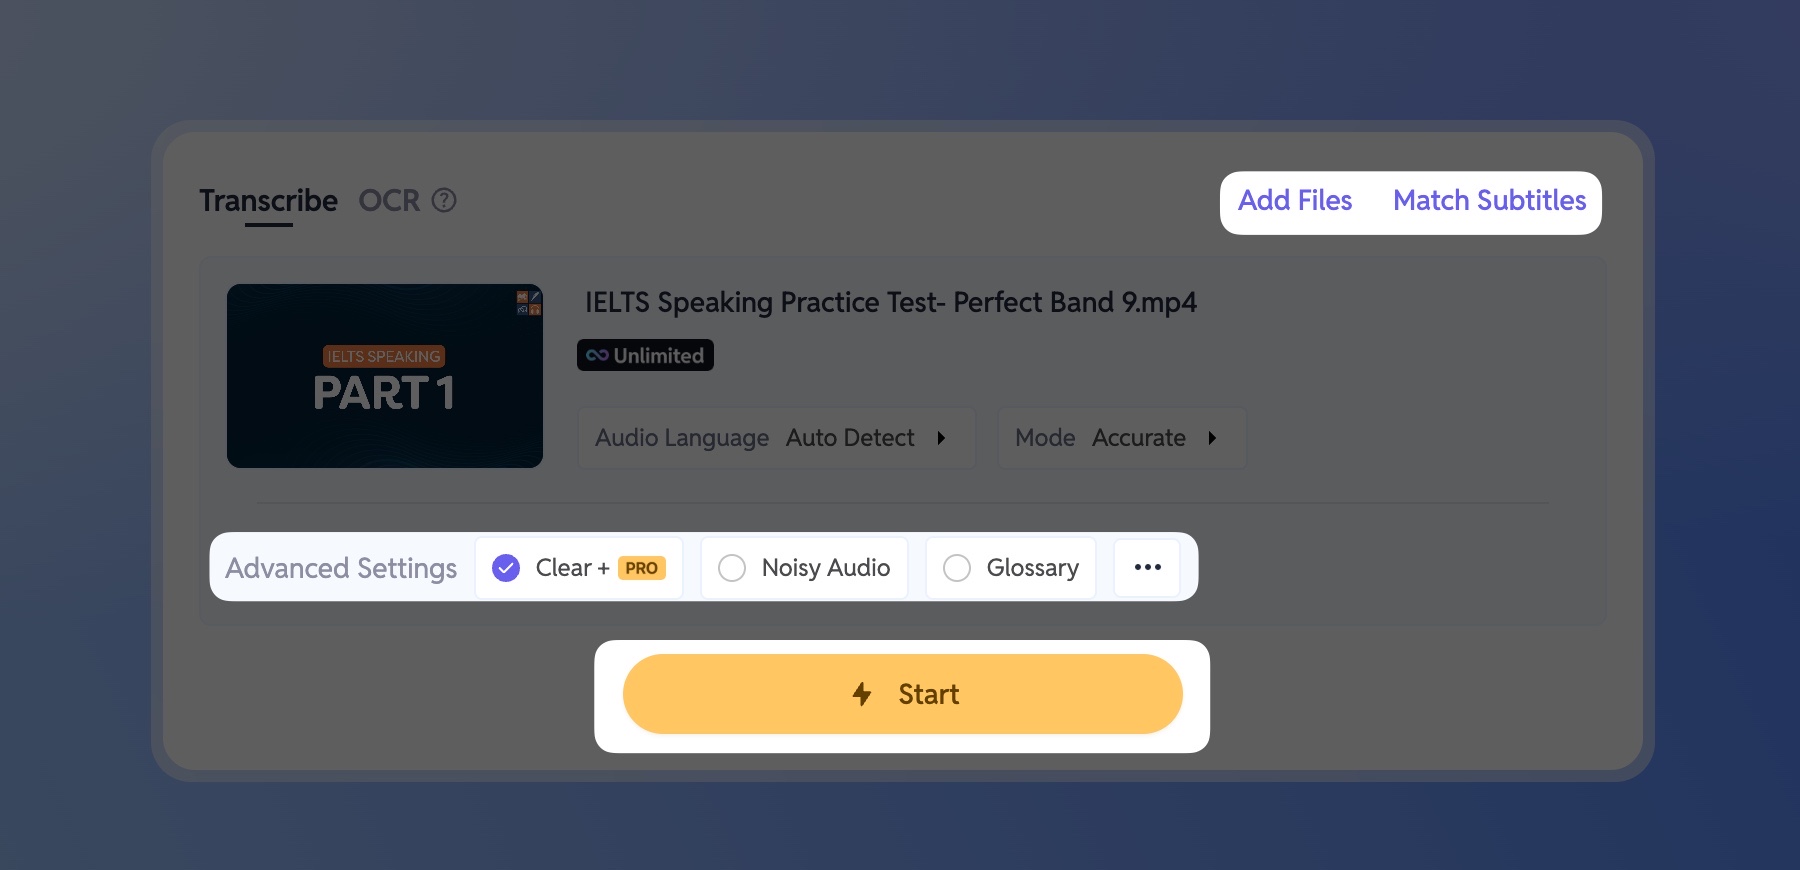
After uploading your file, if you have a SubEasy membership, you can enable the "Clear+" feature for more accurate speech-to-text results (new users can try this for free once).
If you need to process multiple files, use the "Add File" feature. You can upload up to 20 videos at a time with a total length of up to 10 hours.
If you already have an SRT subtitle file for your video, you can choose "Match Subtitles" to skip the transcription process.
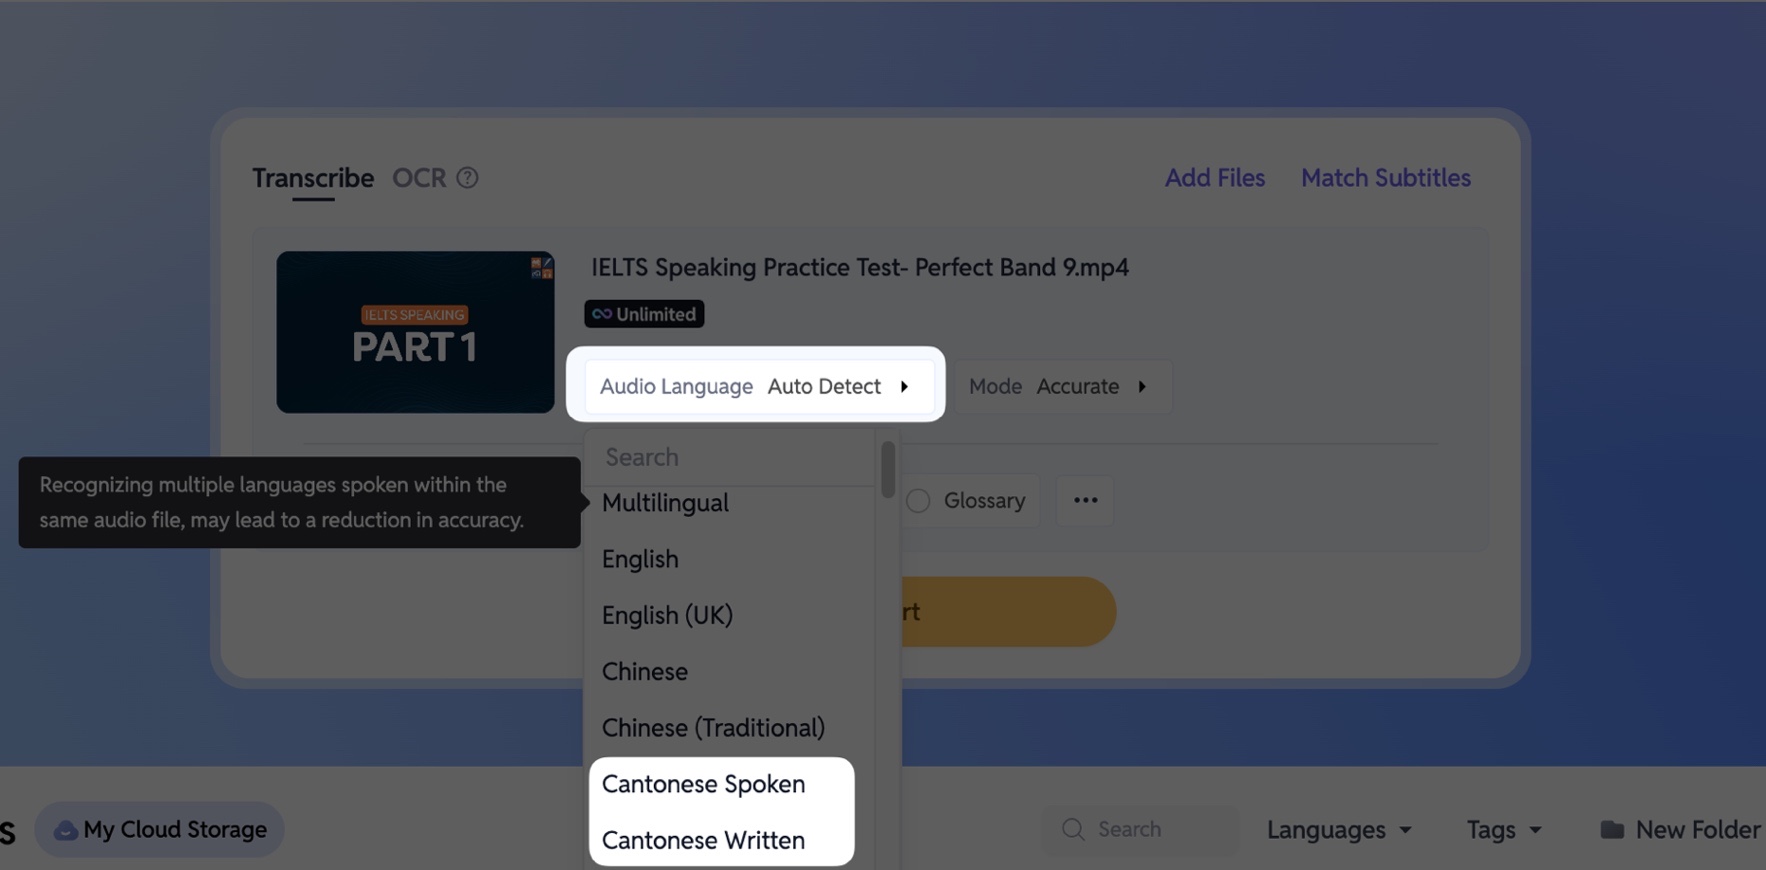
📌 If you're uploading a Cantonese video, you can choose to output in Cantonese Spoken (e.g., "唔係") or Cantonese Written (e.g., "不是"), depending on your needs.
3. Intelligent Sentence Rearrangement
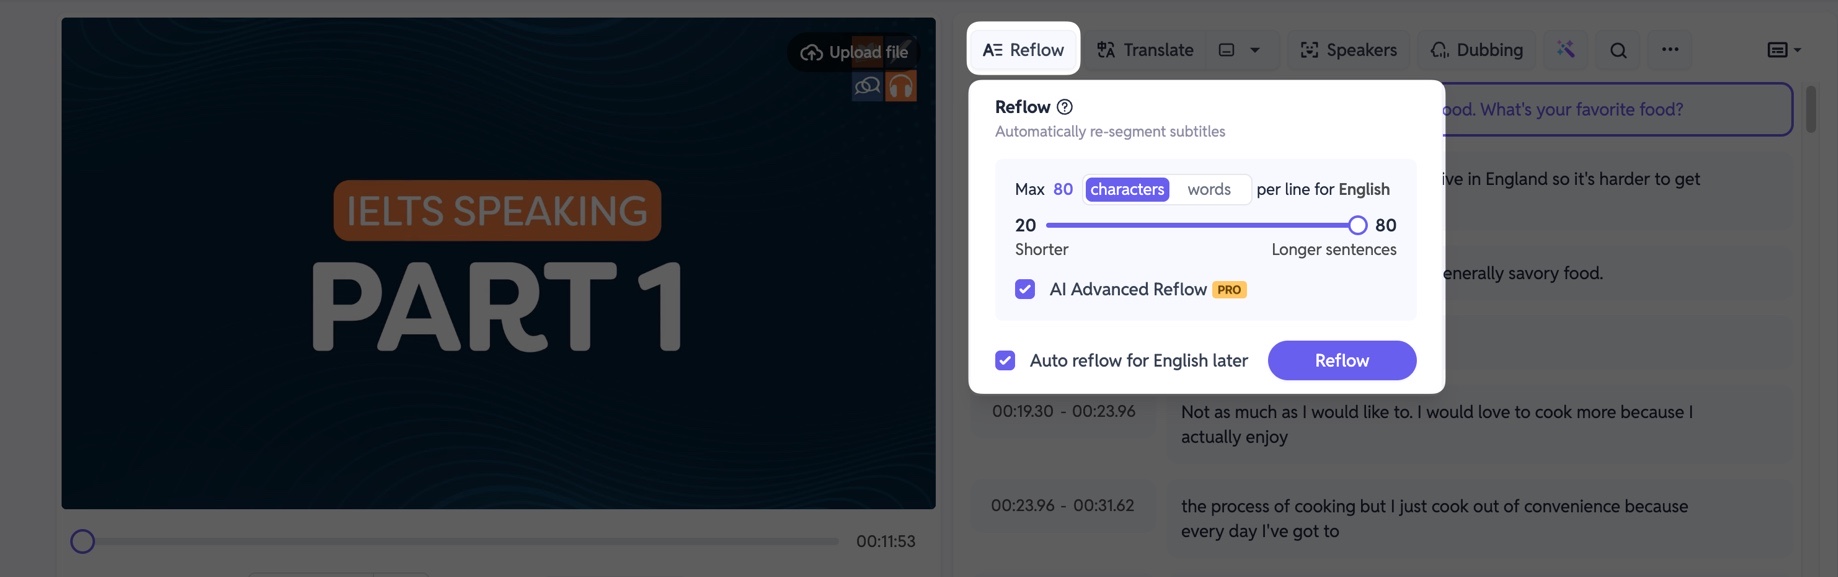
After transcription, don’t rush to translate. You can use our Reflow feature, powered by our semantic segmentation system, to intelligently restructure the transcribed sentences.
If you are a Pro Plan or Unlimited Plan user, you can use the advanced "AI Advanced Reflow" feature, which supports Chinese, English, and Japanese for even more precise results. Suggested settings:
- Chinese videos: 20 characters per segment
- English videos: 80 characters per segment
4. Use AI Polishing and Correction
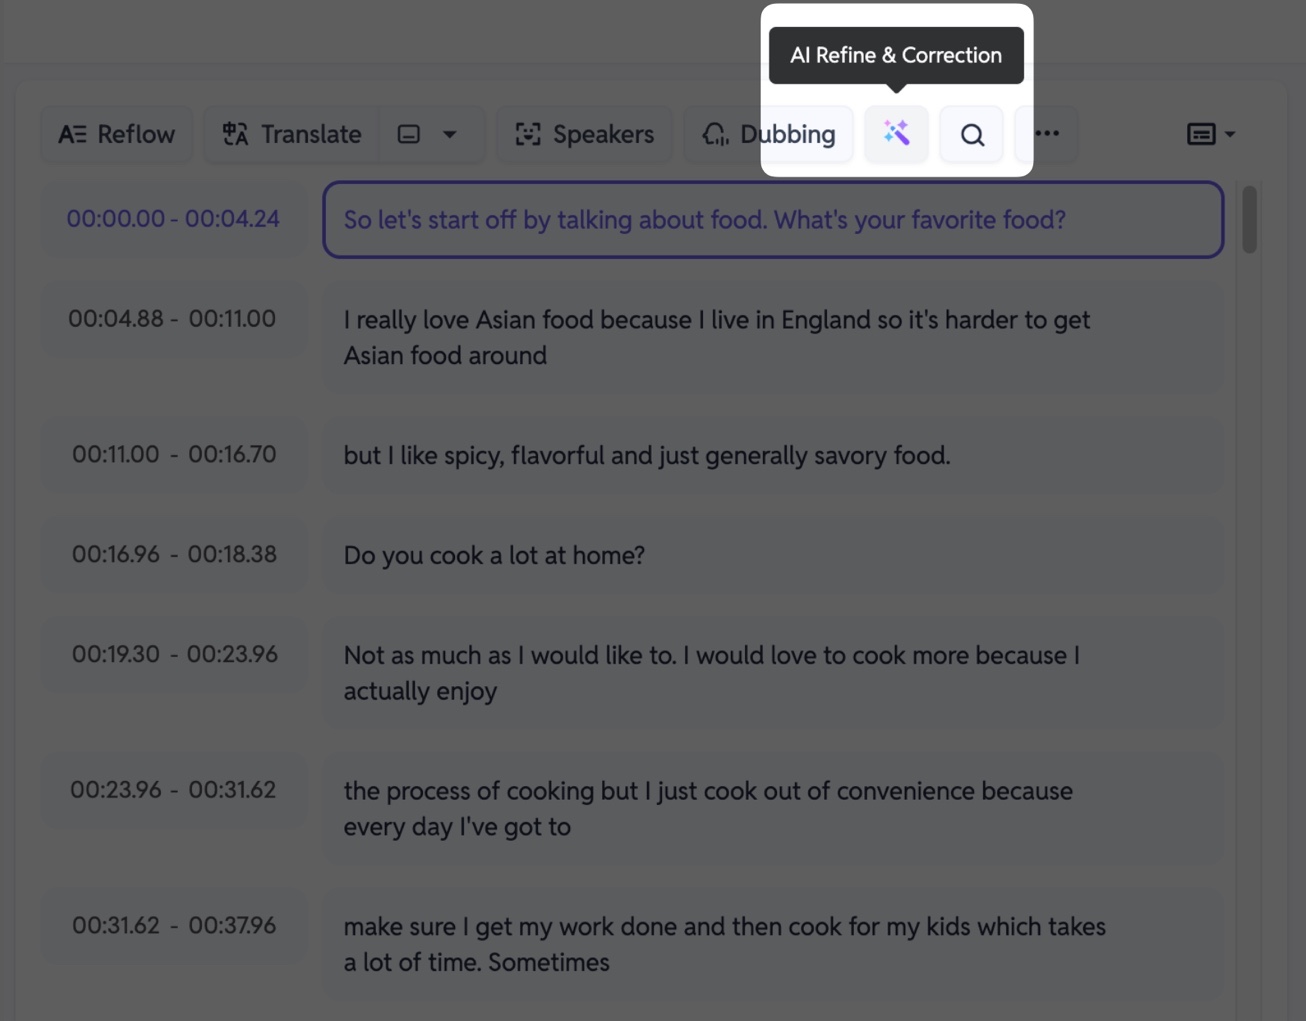
Every language has many homophones and words with multiple meanings, so AI transcription may sometimes make mistakes. To avoid such issues, use our AI Refine and Correction feature. AI will review the full transcription and correct any errors, making your subtitles more natural and accurate.
5. Translate
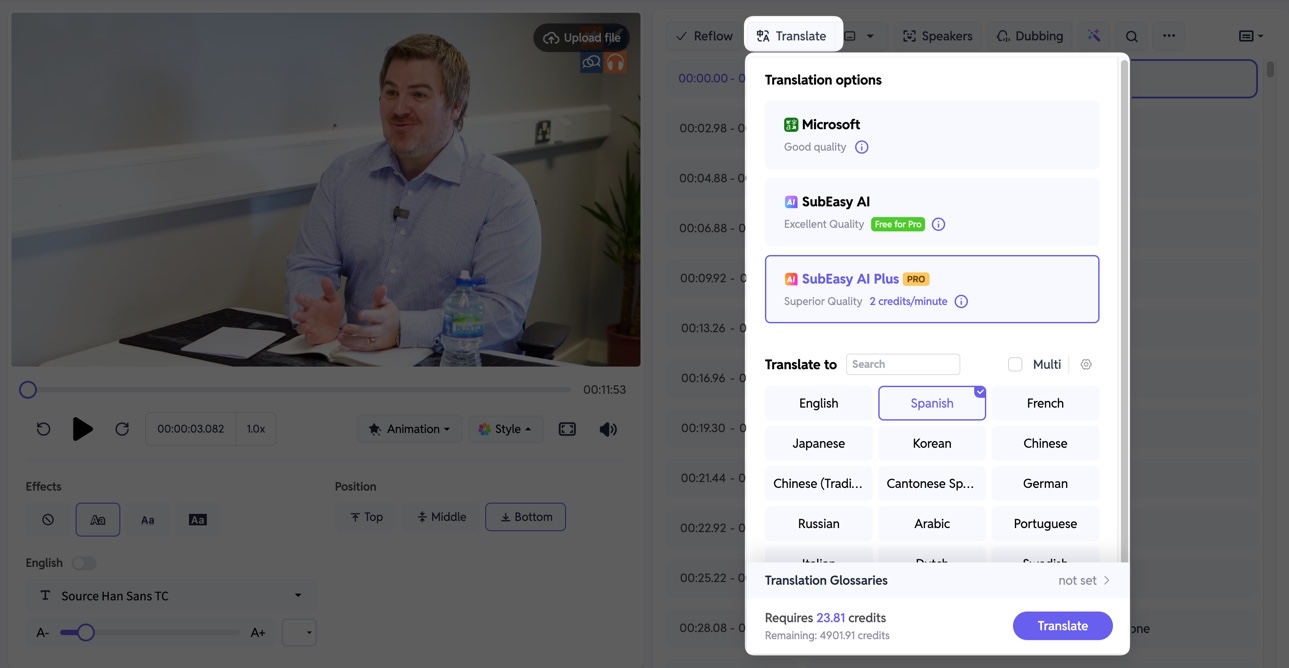
After sentence segmentation and polishing, click "Translate". Choose from three available modes. If you require high translation quality and have enough credits, we recommend using the AI Plus model:
- Microsoft Translation: Uses Google Machine Translation. This option is free but the quality is lower.
- SubEasy AI Translation: Uses a large AI model for translation, offering near-human translation quality. Each minute of video translation uses 0.5 credits. Pro and Unlimited members can translate up to 120 minutes per day using this mode.
- SubEasy AI Plus Model Translation: Uses a dedicated large AI model for translation, providing professional-level quality. This option takes more time and uses 3 credits per minute.
6. Preview and Proofread Subtitles
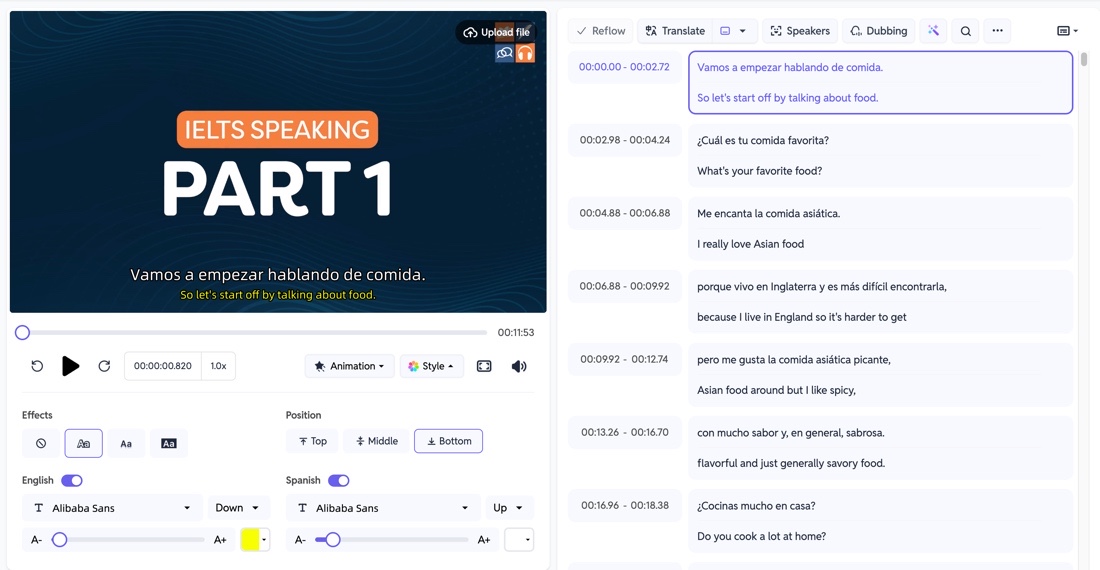
After translation, you can preview the video using the player on the left. Subtitles will scroll on the right, with the current subtitle highlighted. This setup makes it easy to monitor and adjust subtitle timing and accuracy while watching.
7. Edit Subtitle Content
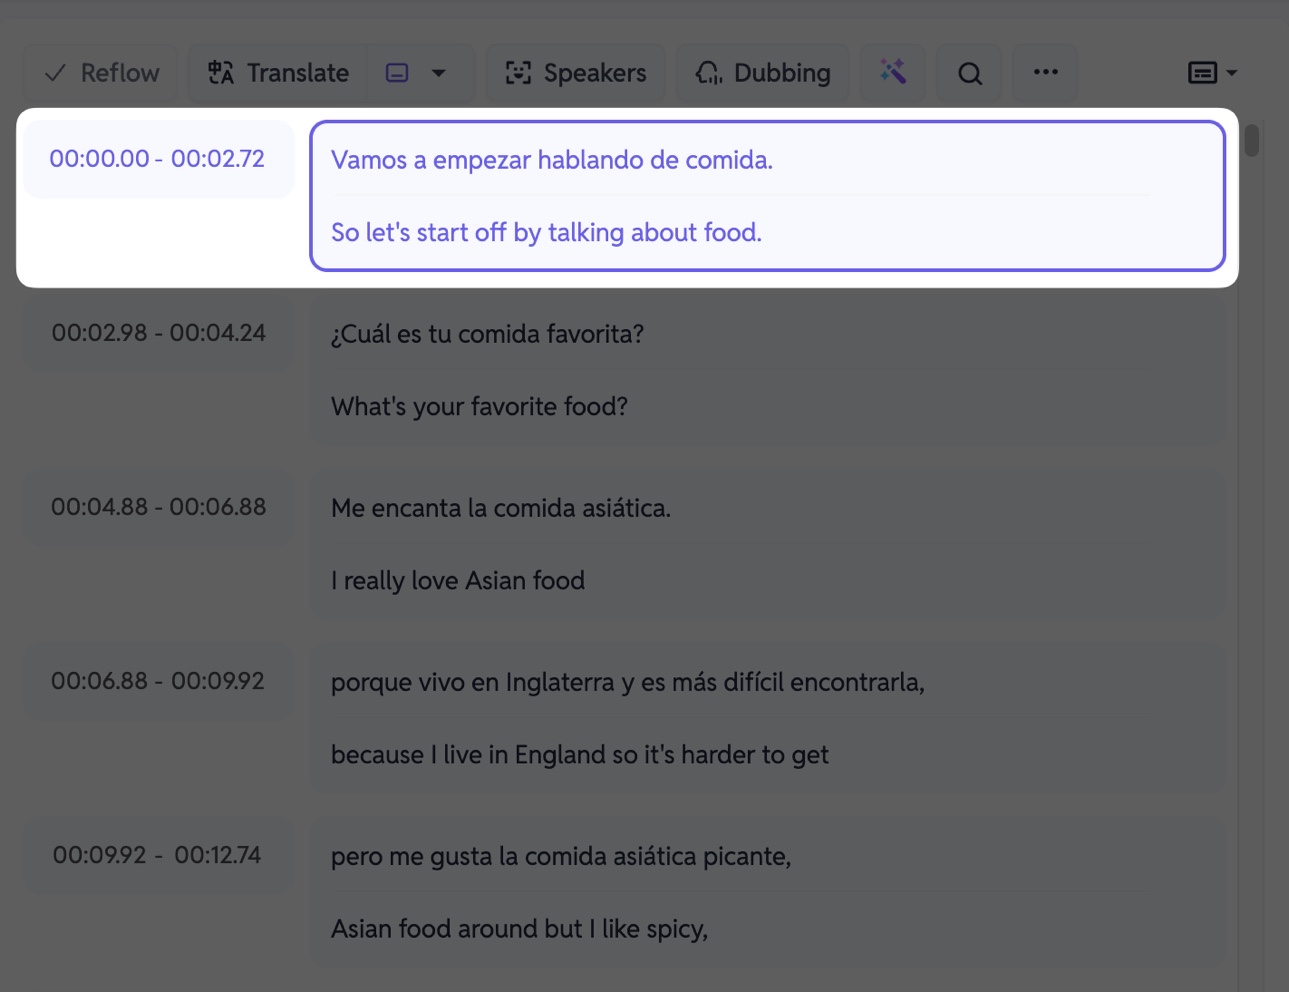
During review, you can check for transcription errors, translation shortcomings, or add anything you want in the text box on the right. Click the text to edit it. This feature ensures your subtitles are accurate and tailored to your needs.
8. Adjust the Timeline
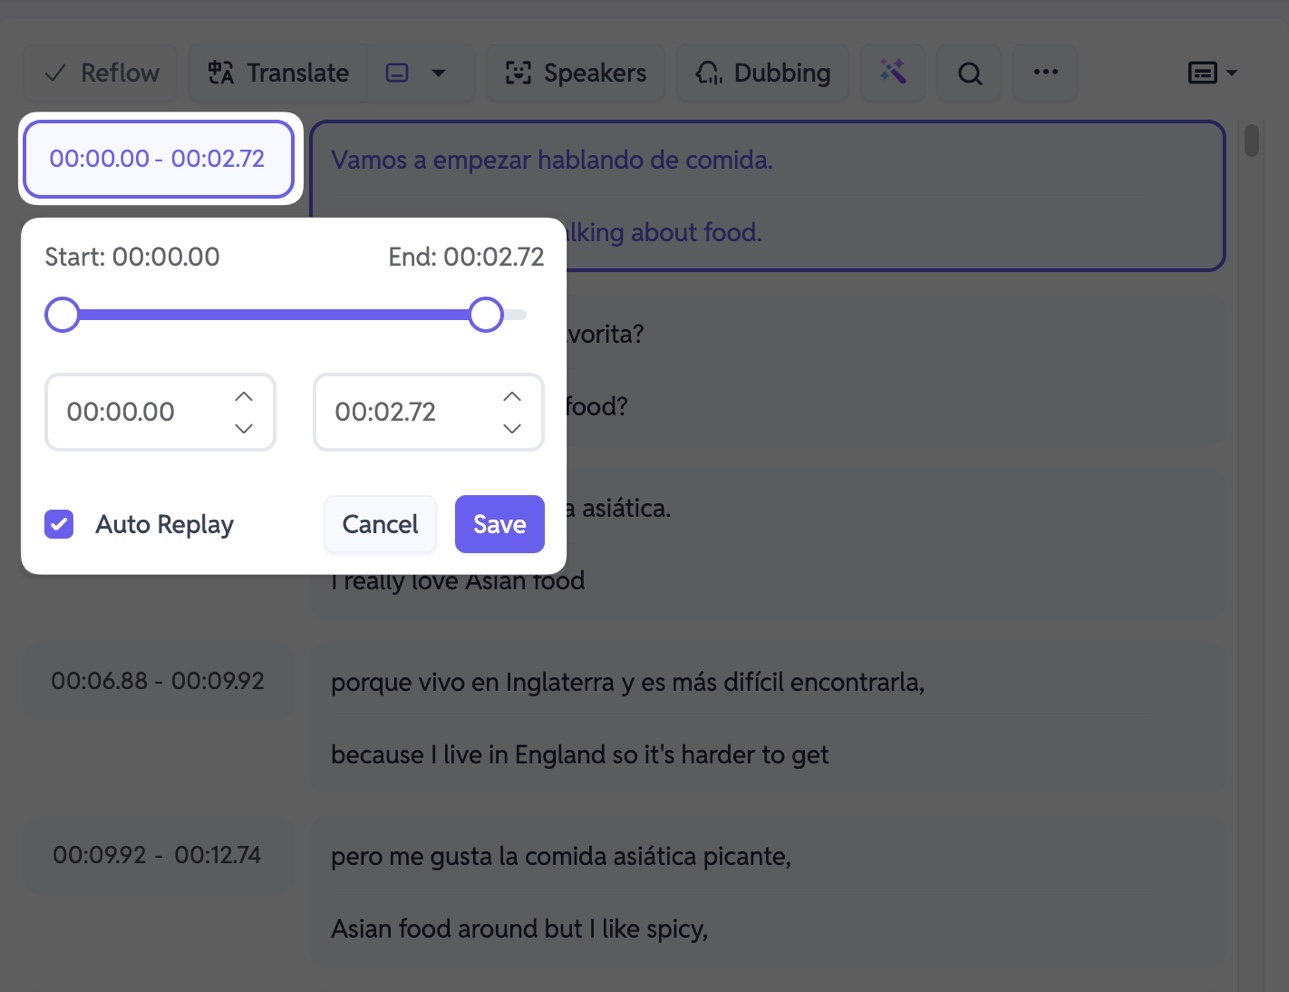
You can also click the time before each subtitle to open the timeline adjustment interface. This is especially useful for fine-tuning specific, critical subtitles. It ensures your subtitles align precisely with the spoken content, enhancing viewer understanding and immersion.
9. Manage Individual Subtitles
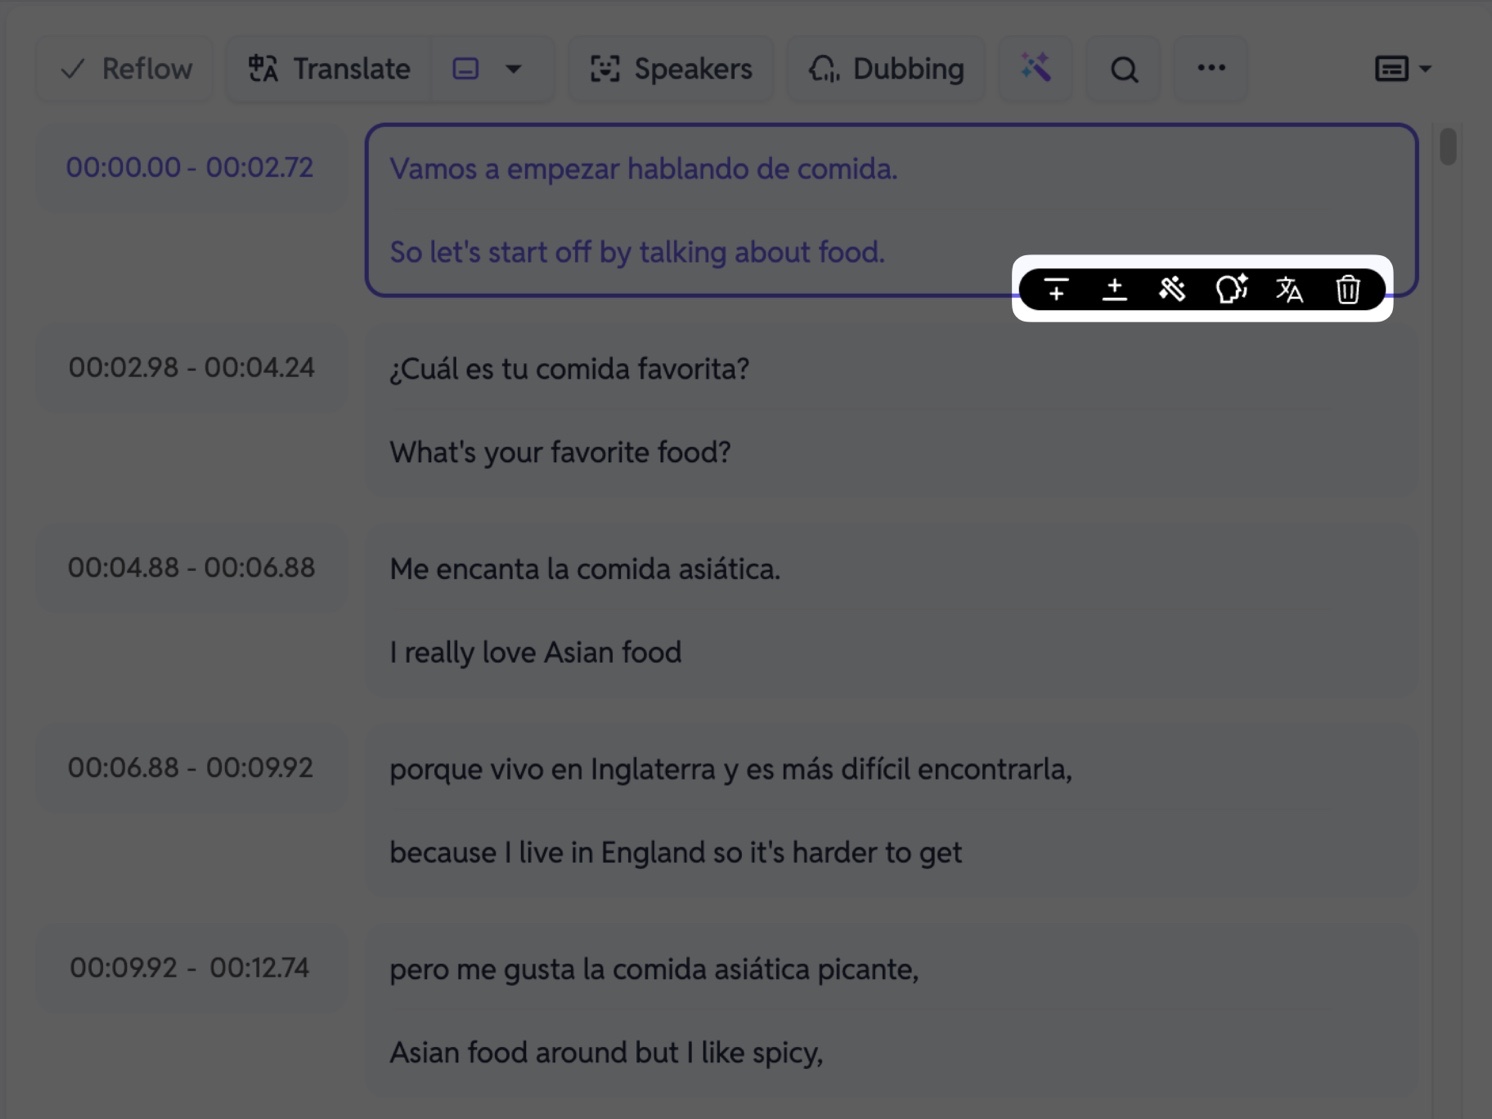
For individual subtitles, move your mouse to the lower right corner of a subtitle to show the menu for that subtitle. You can:
- Add a blank subtitle before this one
- Add a blank subtitle after this one
- Polish this subtitle only
- Generate AI voiceover for this subtitle
- Re-translate this subtitle only
- Delete this subtitle
Adding or removing blank subtitles, combined with step 8, allows you to split and highlight specific subtitles, which is especially useful for clarifying or emphasizing particular parts of the video dialogue.
10. Export Subtitle Files
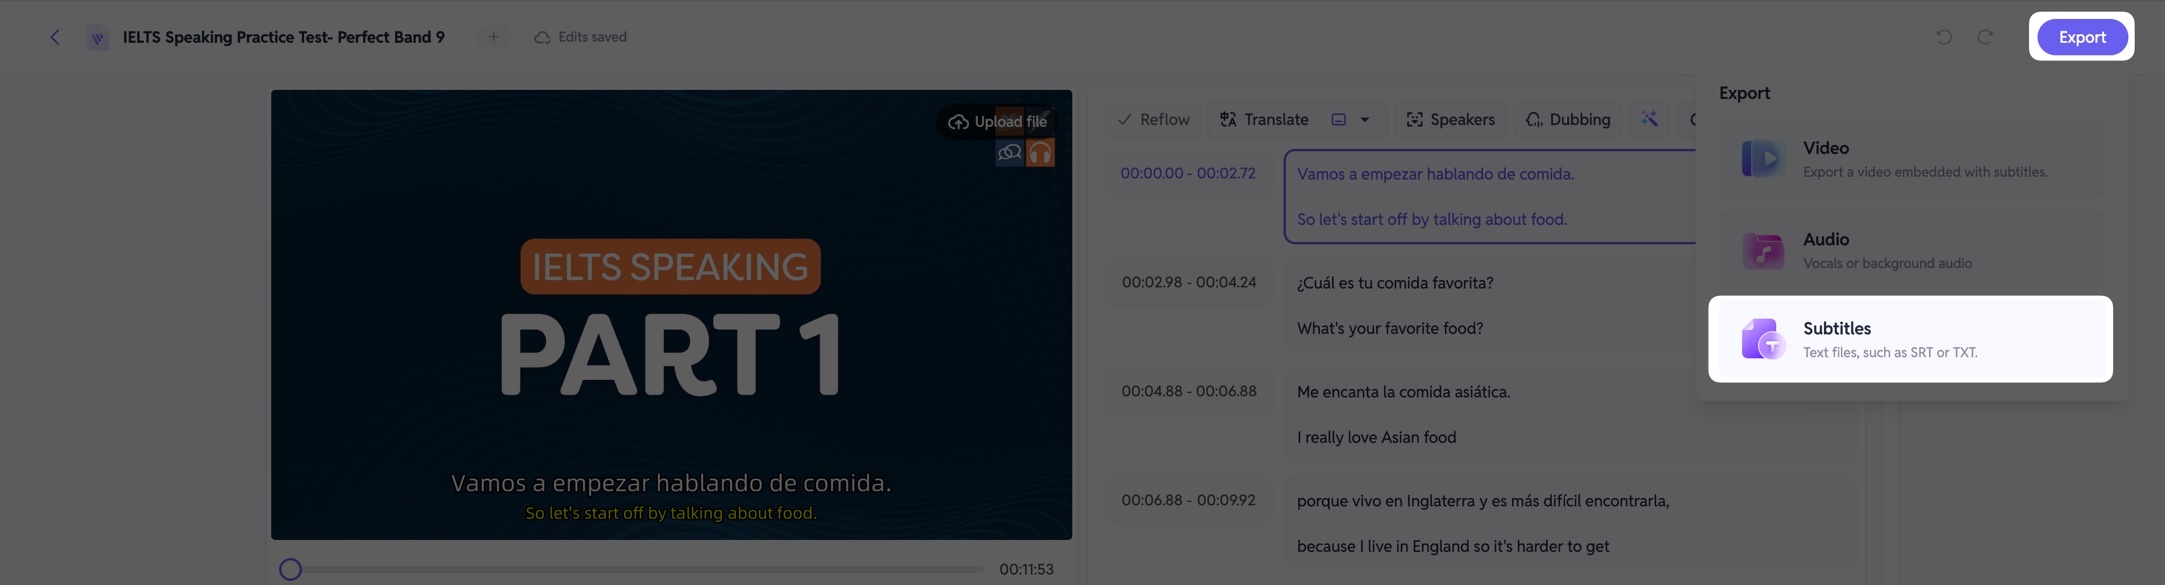
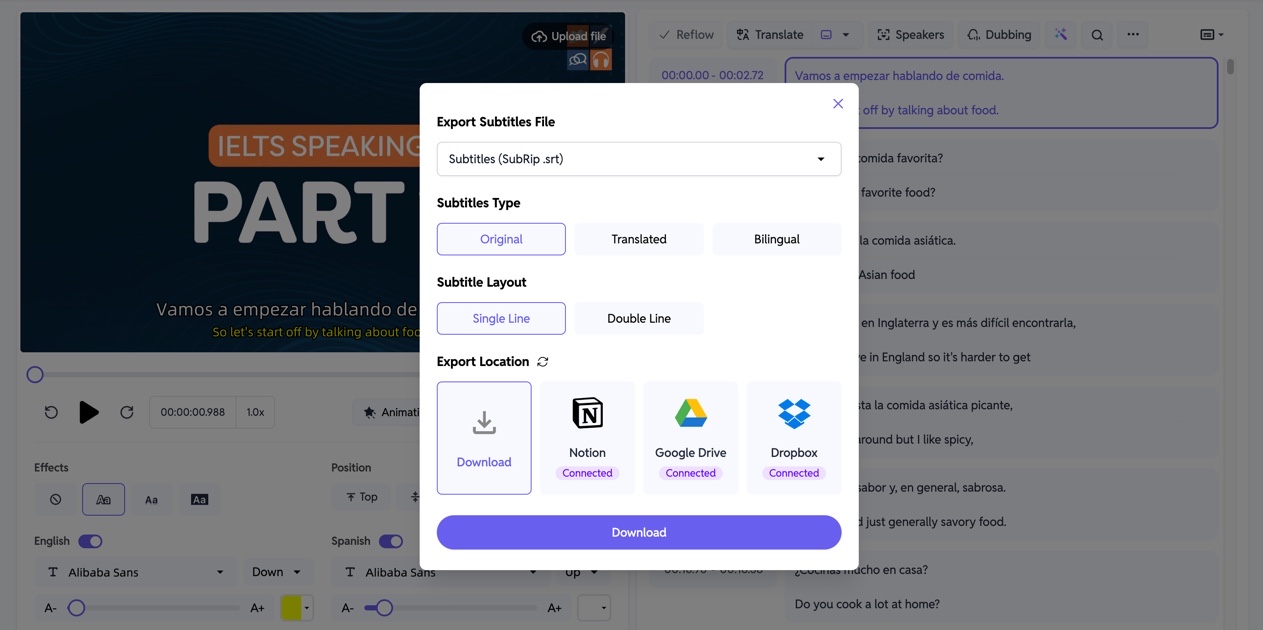
Once all necessary adjustments are complete, if you only need the subtitle text file, you can export it at this step. Click the "Export" button in the upper right corner, select "Subtitles", and choose your settings.
We offer multiple subtitle formats, with SRT being the most commonly used in editing software. Download the subtitles to your computer for further editing. You can also choose to export original, translated, or bilingual subtitles according to your needs. This flexibility supports customized post-production and presentation.
11. Customize Subtitle Styles
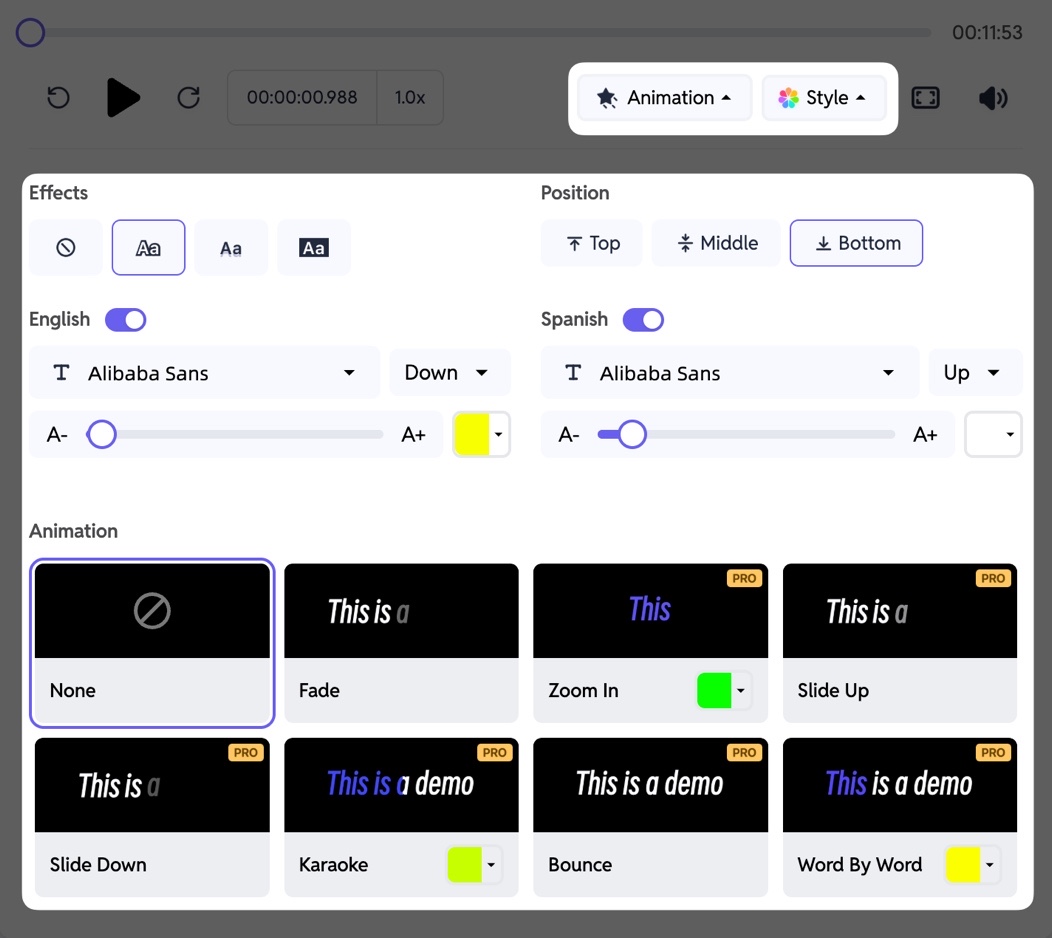
If you want to export the video directly online, SubEasy also offers various subtitle style options. You can design the subtitle background, position, color, font, size, animated subtitles, and more. This feature allows for a more personalized and visually appealing subtitle display, enhancing the overall viewing experience.
12. Export the Final Video
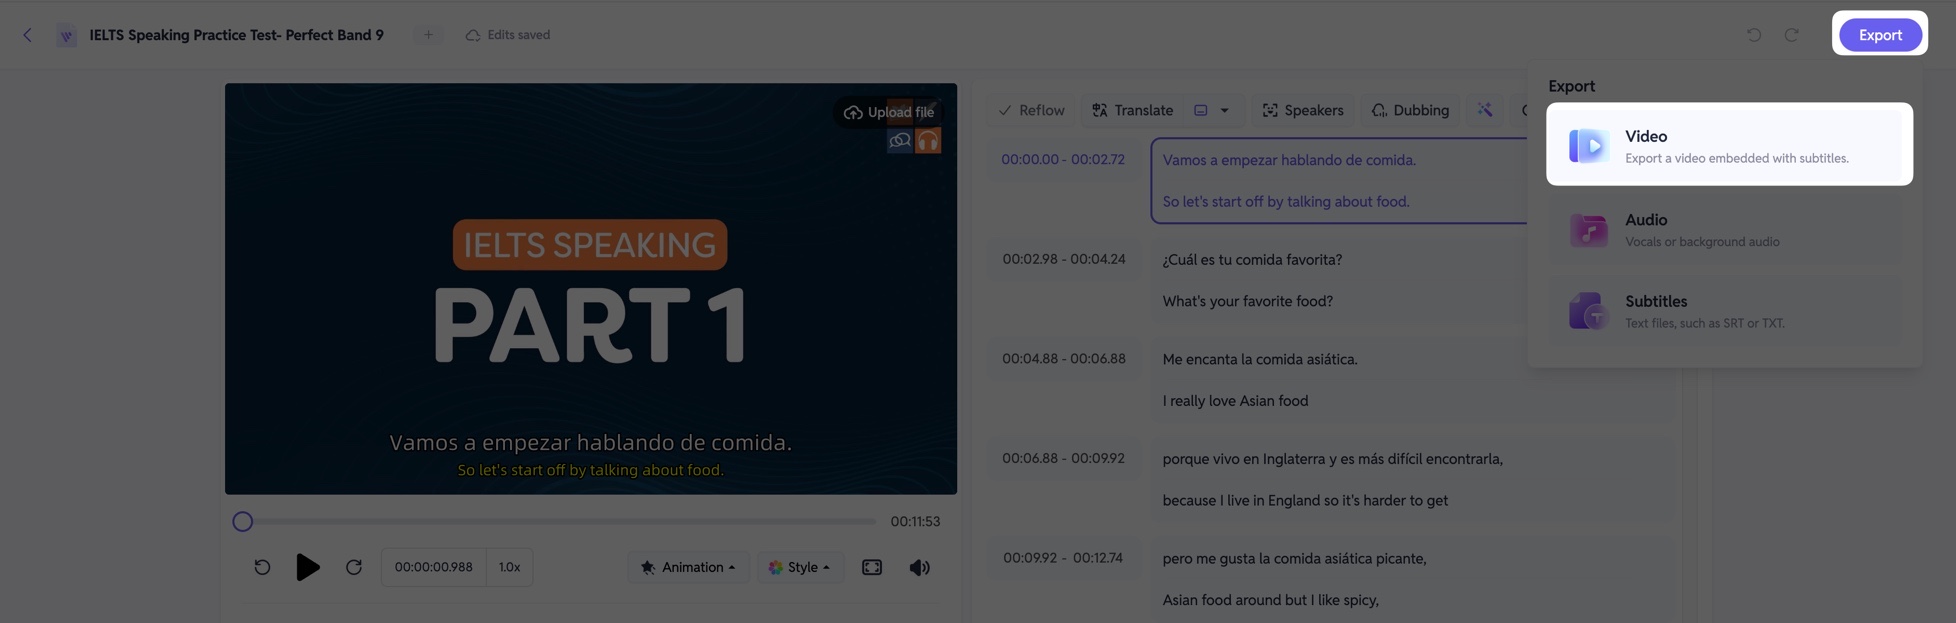
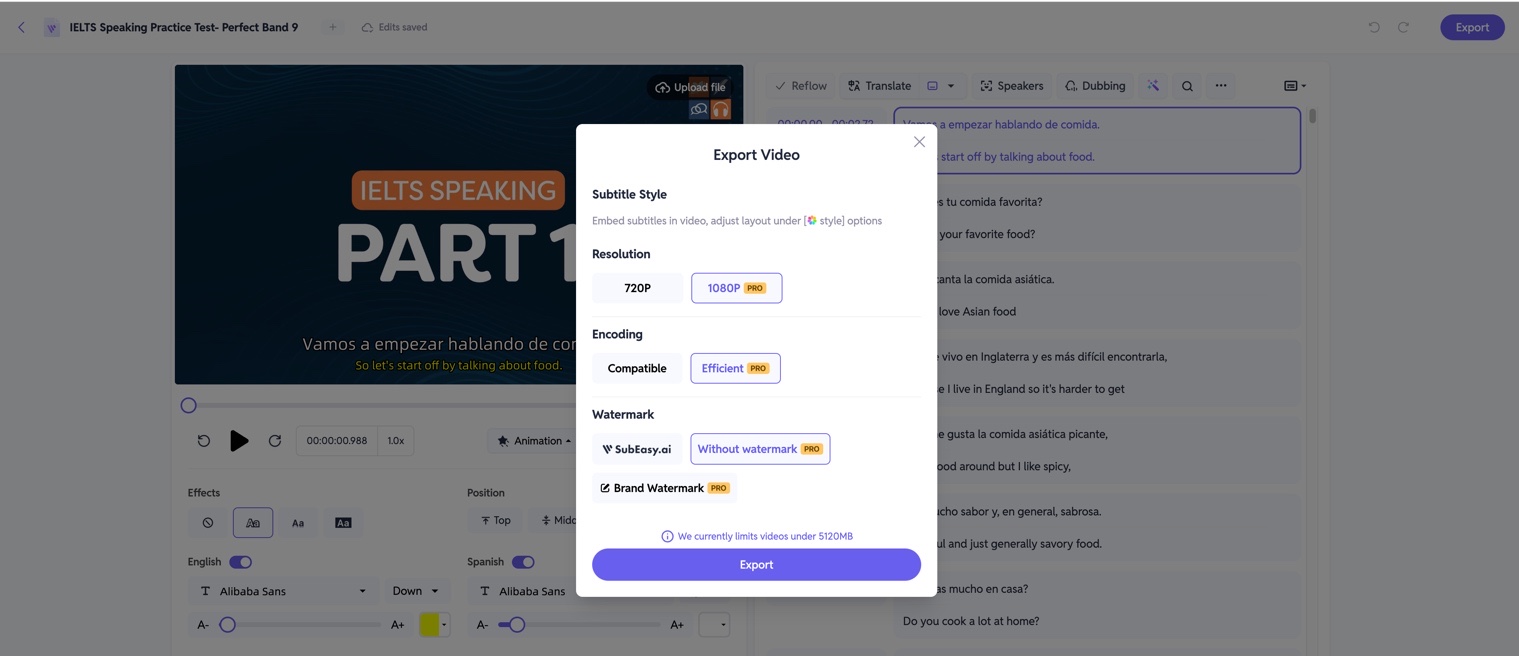
After adjusting the subtitles, click "Export" in the top right, then select "Video" to export your video. Free users can only export videos in 720p resolution with a watermark. Pro Plan or Unlimited Plan user can export up to 4K resolution depending on the original video. This ensures you get high-quality videos suitable for professional or personal use.
Try SubEasy Now!
That’s the complete SubEasy guide. Visit SubEasy.ai and start translating your first foreign language video today!